Monday, December 30, 2019

To add vertex to Polyline

Image result for To add vertex to Polyline autocad"

There are two different ways to add a vertex to existing Polyline:

With command _Pedit
  • Start command and choose the line
  • Choose Edit vertex from parameter
  • Choose Insert to add new vertex after the visible white cross 
With editing grips
  • choose the Polyline that the blue grips are visible
  • Hoover the Mouse over the next grip to the planned new vertex
--> Add Vertex, Strech, Convert to Arc should be visible as commands
  • Choose Add Vertex to insert new vertex

Assigning elevations to feature line

Image result for Assigning elevations to feature line autocad"When creating a feature line, you can assign elevations from a surface or from grading objects. Using the From Gradings option in the Create Feature Lines dialog box creates a temporary surface from the selected gradings to compute the elevations for the feature line. This produces the same result as selecting the grading group surface, and is useful if you have not created a grading group surface.
To assign elevations from a surface to a feature line
  1. Click Grading menu > Create Feature Lines from Objects.
  2. In the Create Feature Lines dialog box, select the Assign Elevations check box.
  3. Select the From Surface option.
    Note: If there are no surfaces in the drawing, the From Surface option will be unavailable.
  4. Select a surface from the list or click the arrow icon to select a surface directly in the drawing.
  5. Select the Insert Intermediate Grade Break Points check box to insert intermediate grade breaks where the entity crosses surface TIN lines. Elevation points will be created at these locations.
To assign elevations from gradings in the current site to a feature line
  1. Click Grading menu > Create Feature Lines from Objects.
  2. In the Create Feature Lines dialog box, select the Assign Elevations check box.
  3. Select the From Gradings option.
    Note: If there are no gradings in the current site, the From Gradings option will be unavailable.
  4. Select the Insert Intermediate Grade Break Points check box to insert intermediate grade breaks where the entity crosses surface TIN lines. Elevation points will be created at these locations.

Was this helpful?

Elevation of projected objects

When projecting a solid to a profile in Autodesk® AutoCAD® Civil 3D® the elevation is not the correct elevation at the top of the solid.
User-added image

Causes:

The label shows the elevation at the center of the solid.

Solution:

Add labels manually to the top of the solid
2017-06-13_0808.png
2017-06-13_0805.png2017-06-13_0808_001.png


Superelevation Variables and Formulas

Image result for Superelevation Variables and Formulas autocad"
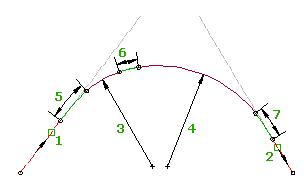
Use the following set of variables to calculate transition distances.
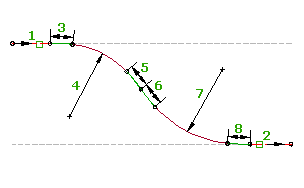
{e} The full superelevation rate. This rate is determined from the superelevation rate table, based on the design speed and curve radius.
{t} The value that is read from the transition length tables, based on the design speed and the curve radius. In most cases, such as AASHTO, this is the transition length value from Level Crown to Full Superelevation. However, this value may not be an actual length, but some other value, such as a transition rate from which the length can be calculated.
{c} The unsuperelevated normal lane slope (positive). This value is defined by the user in the Calculate Superelevation - Lanes Page.
{s} The unsuperelevated normal shoulder slope (positive). This value is defined by the user in the Calculate Superelevation - Shoulder Control Page.
{w} The normal width of the traveled way. This value is defined by the user in the Calculate Superelevation - Lanes Page.
{l} The length of the spiral, if a spiral is involved in the transition. This is the actual length of the spiral element in the curve group.
{p} The fractional part of the transition length before the start of the curve or after the end of the curve.
{q} The rate of increase of centripetal acceleration traveling along a curve at a constant speed.
The variables in the previous table are used to calculate the following:
XML Code Description Example
NC Normal Crown
LC Level Crown
RC Reverse Crown
FS Full Super
The following table describes the formulas:
LCtoFS
The distance from the Level Crown Station to the Full Superelevation station is the value {t}, which is read from the selected transition length table. The formula assumes that the transition length table defines the runoff length.
LCtoBC The distance from the Level Crown station to the Beginning of Curve station is a percentage of the runoff length{t} based on the variable {p}.
NCtoLC The distance from Normal Crown station to the Level Crown Station (tangent runout) is calculated as the runoff length {t}, time the normal crown slope {c}, divided by the full superelevation rate {e}. The tangent runout length is extrapolated from the runoff length.
LCtoRC The distance from the Level Crown station to the Reverse Crown station. (typically uses the same formula as NCtoLC)
NStoNC Normal Shoulder point to Normal Crown point. (used for Breakover Removal Method of superelevated shoulders and Match Lane Slopes)

Roadway Design Standards

Using the Superelevation wizard, you can specify roadway design standards, including superelevation attainment method, minimum radius, and transition length values.
Roadway design standards are contained in the design criteria file. You can customize the design criteria file to reflect your local standards using the Design Criteria Editor dialog box.
The XML-based design criteria file stores the standard tables and formulas that you can use to calculate superelevation rates and superelevation critical stations on an alignment. 
Image result for Roadway Design Standards autocad"

Superelevation Rate Tables

A table of superelevation rates that you can apply to different types of roadways as a function of curve radius and design speed.

Transition Length Tables

A table of values you can use in the Superelevation Attainment Method formulas. You can use the table to calculate the distances between the critical superelevation transition points for different types of roadways as a function of curve radius and design speed. In many cases, the transition length tables provide the actual length of transition of superelevation runoff.

Superelevation Attainment Methods

Specifies how superelevation is applied, and the method that is used to calculate superelevation critical stations for different types of roadways. Each defined method specifies the formulas used to calculate the distances between the critical superelevation transition points.
Autodesk Civil 3D supports two methods of superelevation attainment.
  • Standard. Requires removal of adverse crown. This method is typically used on undivided, crowned roadways and divided roadways with crowned or planar sections.
  • Planar. Does not require removal of adverse crown. This method is typically used on undivided, planar-section roadways, such as ramps and service roads.
In the design criteria file, each attainment method, superelevation rate table, and transition length table have unique, defined names.

Tuesday, December 17, 2019

Extracting Corridor Feature Lines from a Corridor

Using the Feature Lines From Corridor command, you can extract all of the feature lines at once, you can select them one-by-one, or you can select a subset within a corridor region or a polygon.
After you make a selection, you can refine the selection of feature lines from within the Extract Corridor Feature Lines dialog box.

Feature Line Joining Options

You can select the Join Feature Lines in Adjacent Regions check box to join adjacent feature lines of the same code. You can access this check box in the Extract Corridor Feature Lines dialog box.
When this option is selected and the feature lines are extracted, the feature lines are connected if they are contiguous (for example, if the end of one segment and the start point of the next segment are the same point) and are left unconnected if they are not contiguous.

Feature Line Site Options

Feature lines can be created inside of a site or outside of a site. Feature lines created outside of a site will appear in a Feature Lines collection within Prospector. Feature lines created within a site will appear in a Feature Lines collection within the Site collection.

Feature Line Naming Template Options

In addition to the Style Name and Next Counter properties, you can specify several properties for feature line names which help to identify them in relation to the parent corridor, including Corridor Feature Code, Corridor Name, Corridor Region, and Feature Side.
You can access this dialog box from the Extract Corridor Feature Line Settings dialog box.

Dynamic and Static Feature Line Behavior

Extracted feature lines can be dynamically linked to the parent corridor. You specify this behavior in the Extract Corridor Feature Line Settings dialog box.
Tip: Feature lines that have been extracted from a corridor and are either dynamic or static to that corridor can be selected for use as a baseline in the same corridor. 
When a feature line is linked to the parent corridor, you can see Corridor displayed in the Link Type column in the Feature Lines item view in Prospector. When the feature line is not linked, the Link Type column is blank. Different icons are also used to distinguish the feature lines.
When a feature line is not dynamically linked to a corridor, it can be edited with any of the feature line editing commands.
When a feature line is dynamically linked to a corridor, most of the feature line editing commands are not available from the ribbon. The following illustration shows the editing panels on the Feature Line contextual ribbon tab when a dynamic feature line is selected. You can use the Elevation Editor and the Quick Elevation Edit command to view data but not edit it.

Feature Line Smoothing

Feature line segments which represent curves can be smoothed when they are extracted. You specify this behavior in the Extract Corridor Feature Line Settings dialog box.

Feature Line Stationing

Feature lines that are extracted from a corridor are stationed starting a station 0+00, regardless of the start station of the corridor region.
In the following example, the stationing of the feature line as shown in the Extract Corridor Feature Lines dialog box starts at station 8+50. This stationing is measured along the corridor region baseline.
When this feature line is extracted from the corridor, the stationing will start at 0+00 and is measured along the feature line itself rather than the corridor region baseline.

Feature Line Styles and Pay Items

Extracted feature lines are assigned default styles and pay items by way of the code set style they are assigned in the Extract Corridor Feature Line Settings dialog box.

Command Settings

You can specify settings to be used for the Feature Lines From Corridor command by editing the FeatureLinesFromCorridor command settings, available in the Corridor  Commands collection on the Toolspace Settings tab.

Adding Complex Free Curve Groups Between Tangents on Alignments

Use the Alignment Layout Tools to add complex curve groups to your alignment. Complex curve groups consist of multiple curves and spirals and are available in compound and reverse solutions.
Complex free curve groups are defined by the radius of each curve and the length or A value of each spiral. Additionally, a second parameter must be specified for either of the two curves.

To add a free spiral-curve-spiral-curve spiral between two tangents

Add a free spiral-curve-spiral-curve-spiral group between two tangents.
When the attachment tangents (1, 2) are edited, the curve radii (3, 4) and spiral lengths (5, 6, 7) do not change. The attachment points and the curve lengths adjust to accommodate edits to the attachment tangents. The length of any of the spirals can be zero.
The compound Spiral-Curve-Spiral-Curve-Spiral (SCSCS) group is placed between two tangents. This group is similar to the spiral-curve-spiral (SCS) group, but it has a second curve and spiral at the end of the group.
The SCSCS group accepts zero as a spiral length, which allows you to create a multiple curve group with or without spirals. Any of the spirals in this group can have a zero length. A spiral with zero length is effectively omitted from the group. The following combinations are possible by specifying zero as the spiral length: SCSCS, SCSC, CSCS, CSC, SCCS, SCC, CCS, CC.
You cannot grip edit the SCSCS group, but you can edit the tangents to which it is attached. The point of intersection (PI) of the original tangents is maintained, which causes the entire curve group to react to changes to either tangent. You can edit the spiral or curve parameters directly in either the Alignment Layout Parameters window or the Alignment Entities vista. If a spiral in the group has zero length specified, the spiral parameters are still displayed.
  1. Click the alignment. Click Alignment tabModify panelGeometry Editor  Find.
  2. On the Alignment Layout Tools toolbar, click Free Compound Spiral-Curve-Spiral-Curve-Spiral (Between Two Tangents).
  3. Select the tangent (the First Entity) from which you want to add the curve group.
  4. Select the tangent (the Next Entity) to which you want to add the curve group.
  5. Specify the length or A value of the first spiral.
    Note: You can specify length by picking two points in the drawing. Zero is an acceptable length for any of the spirals in this curve group.
  6. Specify the radius of the first curve, or enter D to specify the degree of curvature.
    Note: To calculate the radius or degree of curvature using other known curve parameters, enter 'CCALC to open the Curve Calculator.
  7. Specify the length or A value of the second spiral.
  8. Specify the radius of the second curve, or enter D to specify the degree of curvature.
  9. Specify the length or A value of the third spiral.
  10. Enter a second parameter for one of the curves.
    You can specify an extended tangent length, start point on a tangent, subtended angle, or pass-through point. Enter C to switch the curve for which you will enter the parameter.

To add a free reverse spiral-curve-spiral-spiral-curve-spiral between two tangents

Add a free reverse spiral-curve-spiral-spiral-curve-spiral group between two tangents that are nearly parallel.
This group consists of two successive spiral-curve-spiral groups in opposing directions. When the attachment tangents (1, 2) are edited, the curve radii (4, 7) and spiral lengths (3, 5, 6, 8) do not change. The attachment points and the curve lengths adjust to accommodate edits to the attachment tangents.
You cannot grip edit the reverse SCSSCS group, but you can edit the tangents to which it is attached. You can edit the spiral or curve parameters directly in either the Alignment Layout Parameters window or the Alignment Entities vista.
  1. Click the alignment. Click Alignment tabModify panelGeometry Editor  Find.
  2. On the Alignment Layout Tools toolbar, click Free Reverse Spiral-Curve-Spiral-Spiral-Curve-Spiral (Between Two Tangents).
  3. Select the tangent (the First Entity) from which you want to add the curve group.
  4. Select the tangent (the Next Entity) to which you want to add the curve group.
  5. Specify the length or A value of the first spiral (the spiral in).
    Note: You can specify length by picking two points in the drawing.
  6. Specify a radius for the first curve, or enter D to specify the degree of curvature.
    Note: To calculate the radius or degree of curvature using other known curve parameters, enter 'CCALC to open the Curve Calculator.
  7. Specify the length or A value of the second spiral (the spiral out).
  8. Specify the length or A value of the third spiral (the spiral in).
  9. Specify a radius for the second curve, or enter D to specify the degree of curvature.
  10. Specify the length or A value of the fourth spiral (the spiral out).
  11. Enter a second parameter for one of the curves.
    You can specify a start point on a tangent, subtended angle, or pass-through point. Enter C to switch the curve for which you will enter the parameter.

Adding Free Reverse Spirals to Alignments

To add a free reverse spiral-spiral (between two curves)

Add a free reverse spiral-spiral group between two curves that are in different directions.
The two spirals bend in opposite directions. Spiral parameters and attachment points are automatically calculated. If either of the attachment curves (1, 2) are edited, the spiral-spiral group maintains tangency.
By default, the two spirals have equal lengths and A values. Both values can be modified at the time of creation by specifying a ratio of A1/A2 or L1/L2.
  1. Click the alignment. Click Alignment tabModify panelGeometry Editor  Find.
  2. On the Alignment Layout Tools toolbar, click Free Reverse Spiral-Spiral (Between Two Curves).
    The current spiral definition is displayed at the command line. 
  3. Specify the entity before and the entity after to which you want to add the spiral.
  4. Optionally, enter a value for the ratio of A1 to A2, or select Length and enter a value for the ratio of L1 to L2. Otherwise, the A values and lengths of each spiral will be equal.
    Note: If the curves are in the same direction, a compound solution is given. Enter Yes at the command line to accept the solution, or enter No to restart the command. There is no solution if the curves cross, or for concentric curves.

To add a free reverse spiral-line-spiral (between two curves, spiral lengths)

Add a free reverse spiral-line-spiral group, with specified spiral lengths, between two curves.
The two spirals bend in opposite directions. You specify the spiral lengths (2, 3). The line length is automatically calculated. If either of the attachment curves (1, 2) are edited, the spiral lengths do not change.
In this command you can specify the spiral parameters, but not the line length. Line length is calculated automatically.
  1. Click the alignment. Click Alignment tabModify panelGeometry Editor  Find.
  2. On the Alignment Layout Tools toolbar, click Free Reverse Spiral-Line-Spiral (Between Two Curves, Spiral Lengths).
    The current spiral definition is displayed at the command line. 
  3. Specify the entity before and the entity after to which you want to add the spiral.
  4. Specify either the length or the A value for the spiral in and the spiral out.
    Specify a new value, or press Enter to accept the value that is displayed on the command line.
    • If the alignment has design criteria applied to it, the minimum value for the current design speed is displayed.
    • If the alignment does not have design criteria applied to it, the default value specified in the curve and spiral settings is displayed.
    Note: If the curves are in the same direction, a compound solution is given. Enter Yes at the command line to accept the solution, or enter No to restart the command. There is no solution for concentric curves.

To add a free reverse spiral-line-spiral (between two curves, line length)

Add a free reverse spiral-line-spiral group, with a specified line length, between two curves.
The two spirals bend in opposite directions. You specify the line length (3). The spiral lengths are automatically calculated. If either of the attachment curves (1, 2) are edited, the line length does not change.
  1. Click the alignment. Click Alignment tabModify panelGeometry Editor  Find.
  2. On the Alignment Layout Tools toolbar, click Free Reverse Spiral-Line-Spiral (Between Two Curves, Line Length).
    The current spiral definition is displayed at the command line. 
  3. Specify the entity before and the entity after to which you want to add the spiral.
  4. Specify the line length.
Note: If the curves are in the same direction, a compound solution is given. Enter Yes at the command line to accept the solution, or enter No to restart the command. There is no solution for crossing or concentric curves.