How to Change true Ellipse into Polyline
Use the following procedure to create a polyline ellipse in a new blank drawing. If you already have a drawing with true ellipses, begin at step 3.
- Set the PELLIPSE (System Variable) to 0 (to draw true ellipses)
- Draw an ellipse on the screen.

- Set the PELLIPSE system variable to 1 (to draw polyline ellipses).
- Set the PLINETYPE (System Variable) to 0 (polylines will not be altered when they are placed into the drawing)
- From the Quick Access Toolbar select "Saveas..." or enter dxfout on the command line.
- From the Save As dialog, Files of type: drop-down list, select AutoCAD R12/LT2DXF(*.dxf).

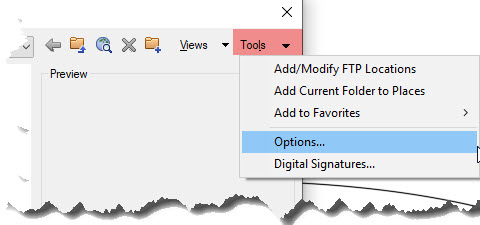
- From the top-right of the Save As dialog, select Tools - Options

- Click the DXF Options tab.
- Select the Select Objects option.

- Click OK, and then click Save.
- Select the ellipse(s), and press ENTER to save the DXF.
- Enter ERASE on the command line .
- Select the ellipse(s), and press ENTER to erase it.
- Enter INSERT on the command line, and select the DXF file.
- Clear the Specify On-screen to Insert the Block at 0,0 option, select the Explode option, and then click OK.

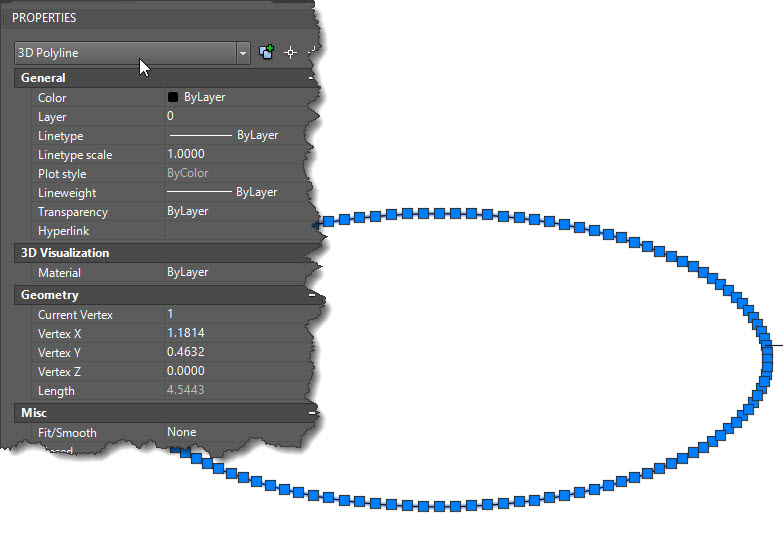
Select the Ellipse and view the properties in the Properties palette. It is now listed as a polyline.


0 Comments:
Post a Comment
Subscribe to Post Comments [Atom]
<< Home